
WooCommerce is a popular plugin for online stores. It helps you manage products, orders, and customers. But, default emails can look boring. Customizing them makes your store look professional.
Why Customize WooCommerce Emails?
Customized emails look unique. They match your store’s brand. This helps build trust with customers. They also provide important information in a clear way.
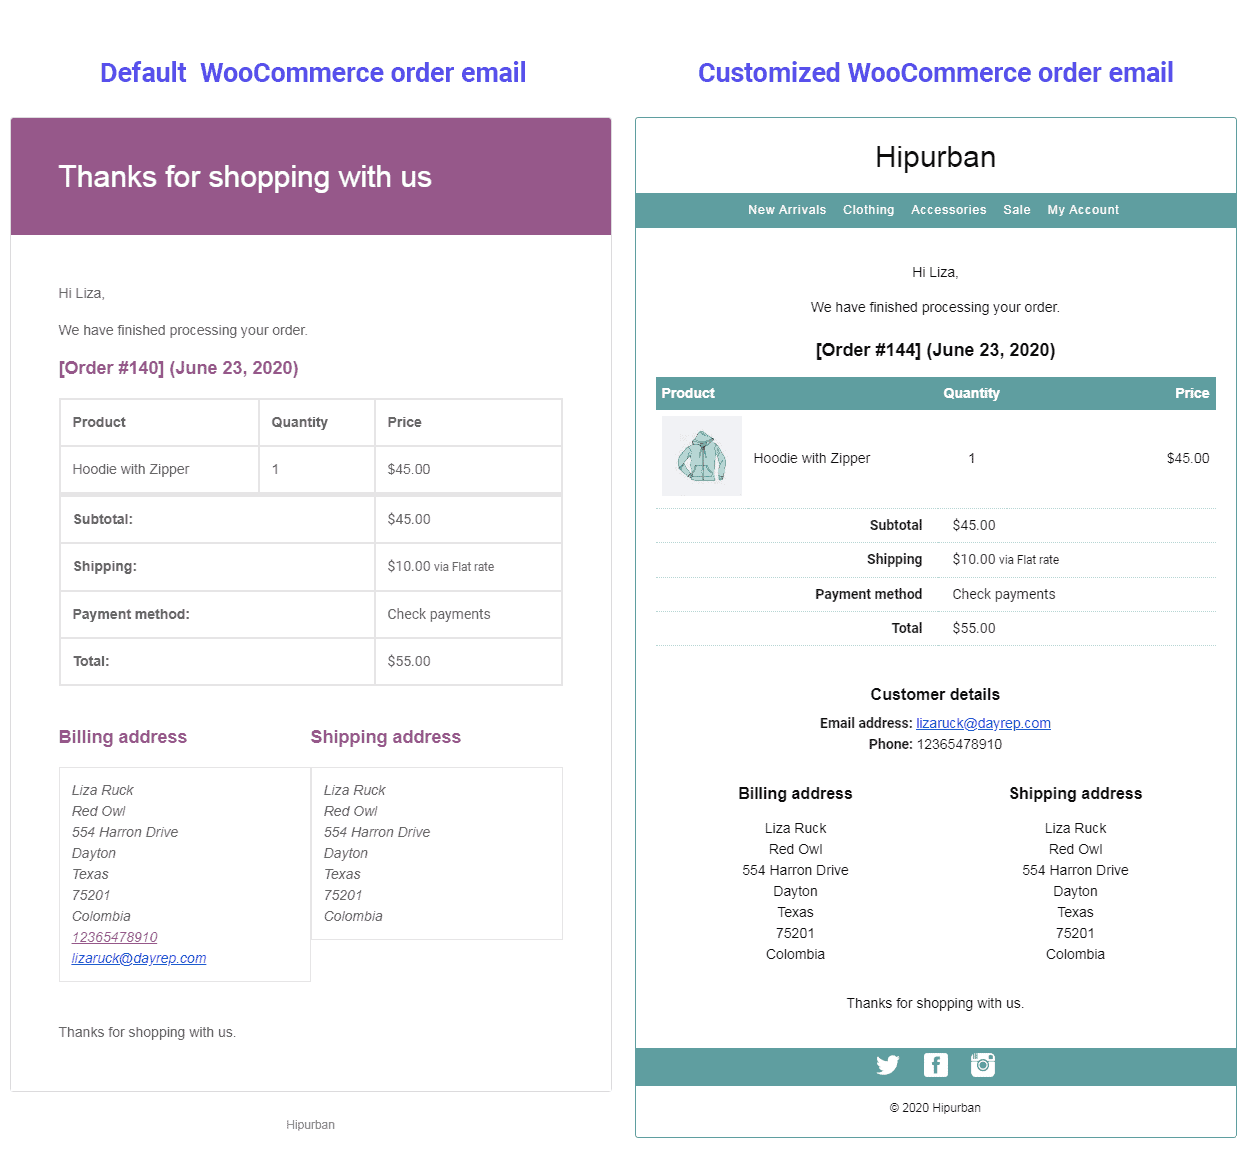
Credit: www.storeapps.org
Steps to Customize WooCommerce Emails
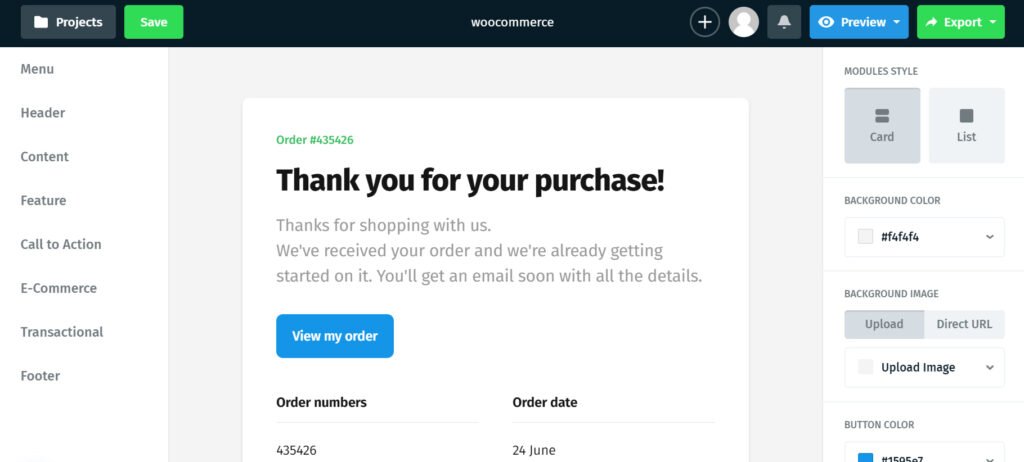
1. Access Email Settings
First, log in to your WordPress dashboard. Next, go to WooCommerce. Click on ‘Settings’ then ‘Emails’. Here, you will see a list of emails WooCommerce sends.
2. Choose The Email To Customize
Choose the email you want to customize. For example, ‘New Order’ email. Click on ‘Manage’. This takes you to the customization screen.
3. Customize Email Header And Footer
Scroll down to ‘Email Header’. Here, you can add your store’s logo. This makes your emails look professional. Next, go to ‘Email Footer’. Add your store’s contact information here.
4. Edit Email Content
Go to the ‘Email Content’ section. You can change the subject line. You can also edit the email body. Use simple and clear language. Make sure the email provides all needed information.
5. Use Shortcodes
Shortcodes help display dynamic content. For example, use {site_title} to show your store’s name. Use {order_date} to show the order date. This makes emails more personalized.
6. Save Changes
After making changes, click ‘Save’. This updates the email template.
Using Email Customizer Plugins
Plugins can make customization easier. Here are some popular plugins:
- WooCommerce Email Customizer: This plugin offers a drag-and-drop interface. You can easily add images, text, and other elements.
- YITH WooCommerce Email Templates: This plugin offers pre-designed templates. You can customize colors, fonts, and layout.
- MailPoet: This plugin helps you design beautiful emails. It also offers advanced features like segmentation.
How To Use A Plugin
First, install the plugin. Go to ‘Plugins’ then ‘Add New’. Search for the plugin name. Click ‘Install’ then ‘Activate’.
Next, go to the plugin settings. Follow the instructions to customize your emails. Save your changes when done.
Testing Your Emails
Before sending emails to customers, test them. This ensures everything looks good. Follow these steps:
1. Use The Woocommerce Test Email Feature
Go to WooCommerce ‘Settings’ then ‘Emails’. Choose the email you customized. Click ‘Manage’. Scroll down and click ‘Send test email’. Check your inbox for the test email.
2. Use A Testing Plugin
Plugins like ‘WP Mail Logging’ can help. Install and activate the plugin. It logs all emails sent from your site. You can view and test them easily.
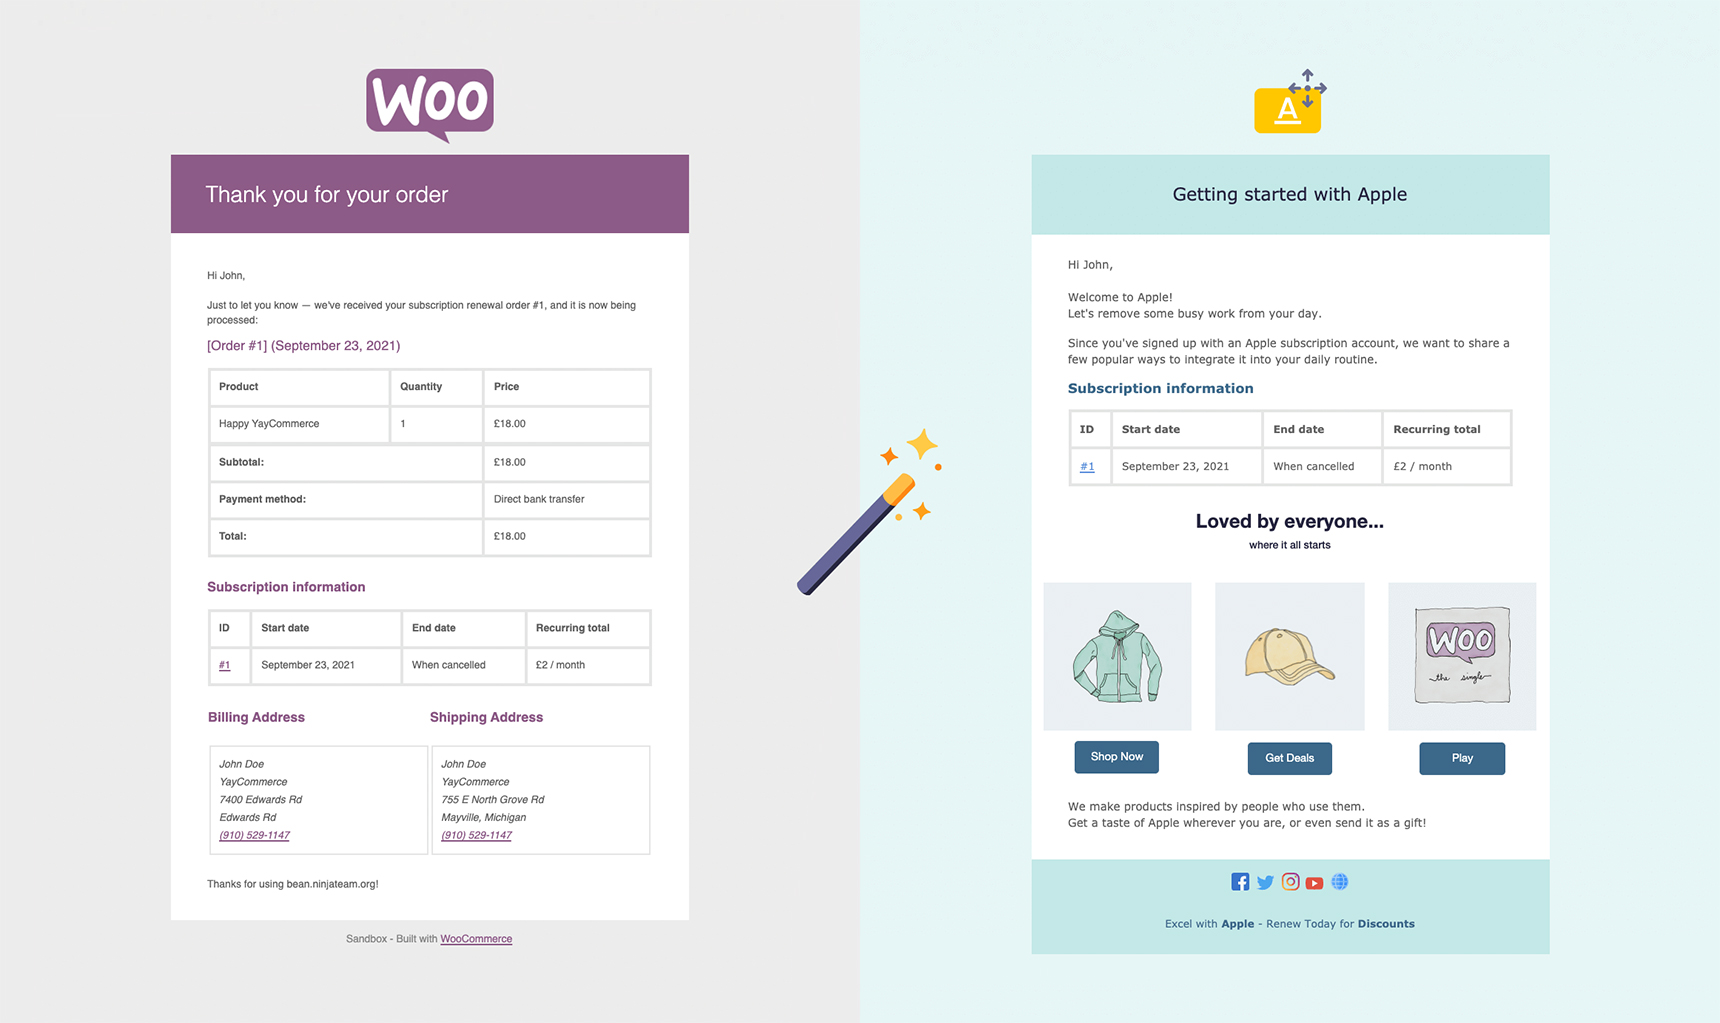
Credit: artbees.net
Best Practices for Email Customization
Follow these tips for best results:
- Keep It Simple: Use clear and concise language. Avoid clutter.
- Use Your Branding: Match emails with your store’s colors and logo.
- Provide Clear Information: Make sure all important details are easy to find.
- Test Your Emails: Always test before sending to customers.
Frequently Asked Questions
How Do I Customize Woocommerce Email Templates?
You can customize WooCommerce email templates from the WordPress dashboard under WooCommerce > Settings > Emails.
Can I Change The Email Logo In Woocommerce?
Yes, you can change the email logo in WooCommerce under WooCommerce > Settings > Emails > Email Options.
How To Edit Woocommerce Email Content?
Edit WooCommerce email content by copying the template to your theme folder and modifying it.
Can I Add Custom Css To Woocommerce Emails?
Yes, you can add custom CSS to WooCommerce emails through your theme’s style. css or a custom plugin.
Conclusion
Customizing WooCommerce emails is important. It makes your store look professional. Follow the steps above to customize your emails. Use plugins for easier customization. Always test your emails before sending. Happy customizing!